When you think of foam rolling, you probably imagine lying on the floor grimacing through tight muscles. For many beginners, people with sensitive joints, or those living in small spaces, that classic setup is not ideal. Wall-assisted foam rolling offers a more comfortable way to release tension in your lats, chest and upper back, using your bodyweight more gently and keeping you in a stable, upright position. This routine is perfect for home gym users who want effective muscle recovery and better posture without feeling overwhelmed.
Why use the wall instead of the floor?
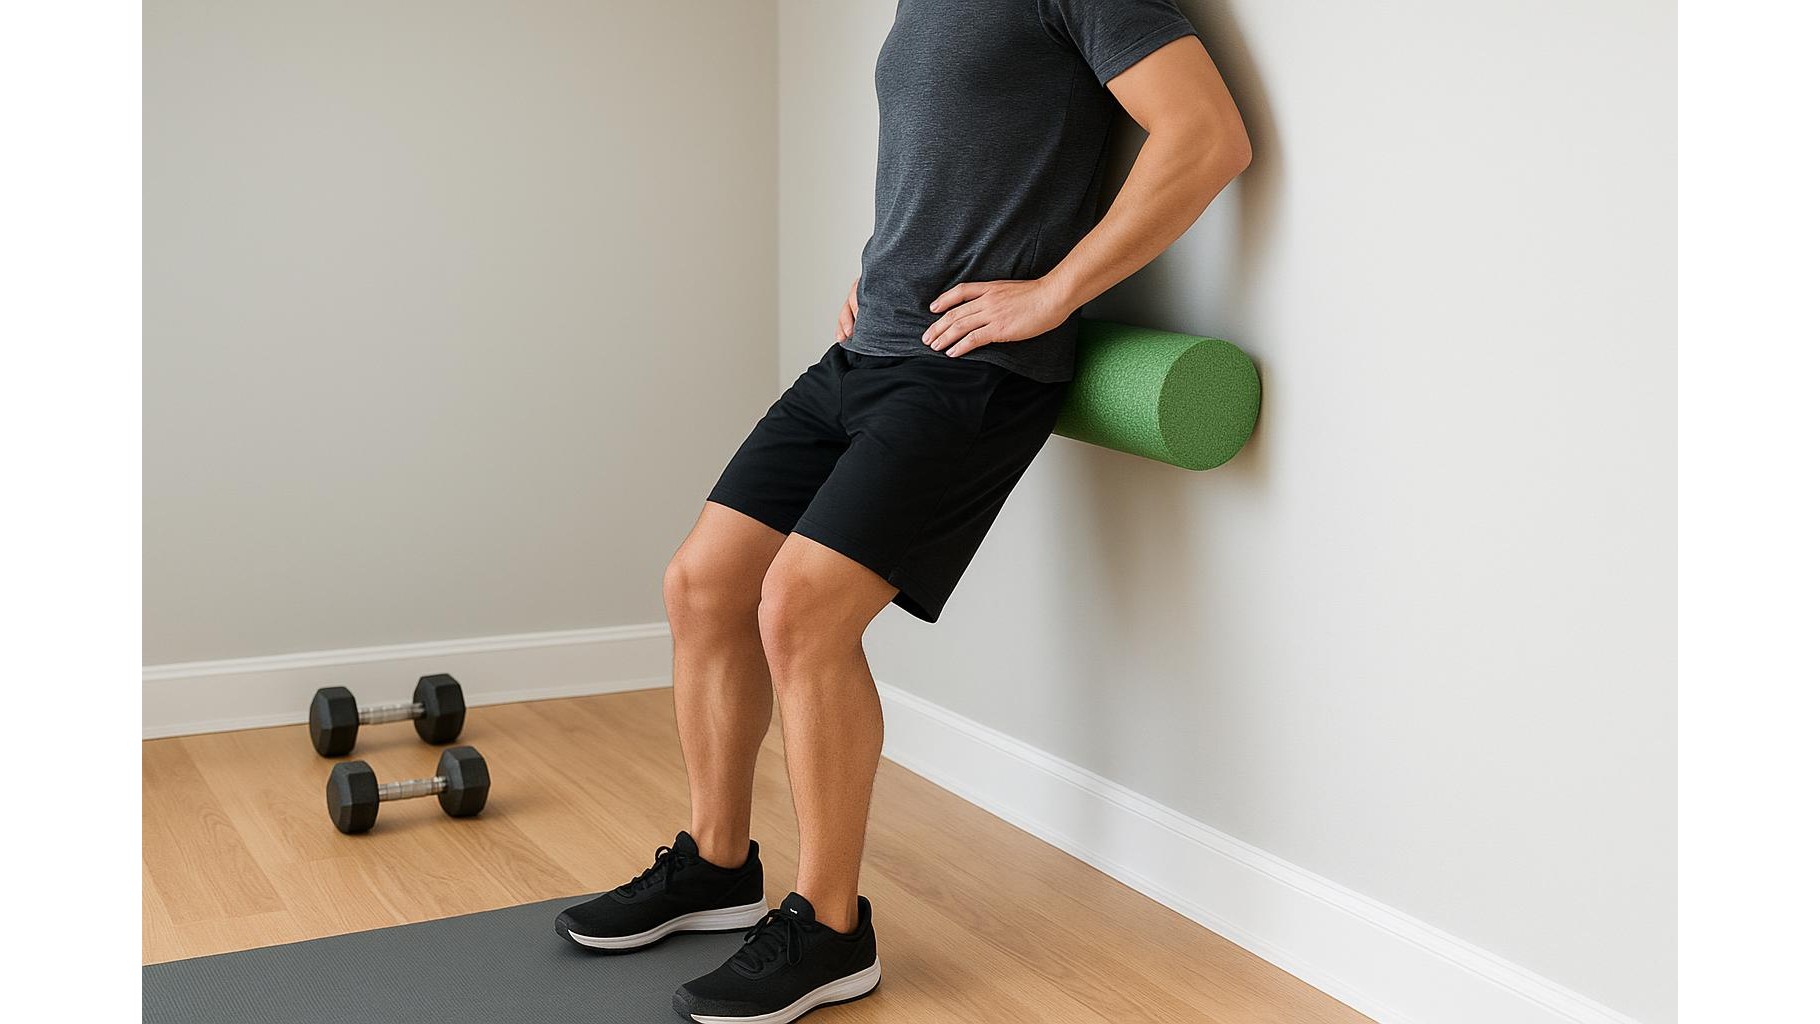
Traditional floor foam rolling can be intense because you place most of your bodyweight directly on the roller. If you are new to self-massage, have sensitive ribs or shoulders, or struggle getting on and off the floor, this can make you avoid rolling altogether. Using a wall lets you control pressure simply by stepping closer or further away. Your joints stay in more natural, comfortable positions, and you can pause or adjust at any time. Wall-assisted rolling is also ideal in a compact home gym, because you only need a clear section of wall and a basic foam roller to start.
Choosing the right foam roller for gentle wall work
For beginners, a soft- to medium-density foam roller around 30–45 cm long works best. Look for a smooth or lightly textured surface, rather than aggressive spikes, to keep pressure comfortable while you learn the technique. A classic example is a generic high-density foam roller available on Amazon in 30 cm or 45 cm lengths, which combines enough firmness to reach the muscles with a simple cylinder shape that sits easily between you and the wall. When you choose, prioritise stability (not too small in diameter), a grippy surface that will not slip on clothing, and durability so the roller keeps its shape over time. Avoid very short or heavily ridged rollers at first, as they can feel too sharp for sensitive upper body areas.
Wall setup and safety tips for beginners
Before you start your wall-assisted foam rolling routine, clear a space so you can step forward and back without obstacles. Stand with your back to the wall, bend your knees slightly and keep your core gently braced to protect your lower back. Place the foam roller between your body and the wall, then use small, controlled movements—never fast bouncing. On a pain scale from 0 to 10, aim for a 3–5: noticeable pressure but still comfortable enough to breathe slowly. Avoid rolling directly over bones (like the spine itself or the front of the shoulder joint). If you feel sharp, nervy or electric sensations, stop, adjust your position, or reduce pressure by stepping away from the wall. When in doubt, consult a physiotherapist or qualified coach, especially if you have existing shoulder, neck or back issues.
Wall-assisted techniques for lats, chest and upper back
To roll your lats, stand sideways to the wall and wedge the foam roller between your side and the wall, roughly below your armpit. Lean in gently and slowly bend and straighten your knees so the roller moves up and down along the broad muscles on the outside of your ribcage. For the chest, face the wall at a slight angle and place the roller across the front of your shoulder and upper chest, then make small diagonal sweeps, keeping the pressure light and breathing fully. For the upper back, stand with the roller across your shoulder blades, hug your arms lightly in front of you to open the space between the shoulder blades, and perform short, controlled knee bends to move the roller up and down. Spend 30–60 seconds per area and repeat up to two rounds if you feel better afterwards.
Integrating wall-assisted rolling into your home routine
A simple wall-assisted foam rolling session for the upper body can take as little as 5–10 minutes, making it easy to add before or after your home workouts. Use it in your warm-up to gently increase blood flow to the lats, chest and upper back before pressing or pulling exercises, or in your cool-down to reduce post-session tightness. Pair the roller with slow, deep breathing and, if you like, a short stretching sequence immediately after each muscle group. Over time, you should notice improved overhead mobility, less stiffness from desk work, and a more relaxed posture. Consistency matters more than intensity: a few comfortable minutes several times a week beats one brutal session that leaves you sore.
Who benefits most from wall-assisted foam rolling?
Wall-assisted rolling is especially helpful for beginners, older adults, and anyone returning to training after a break or managing mild aches from everyday life. If you find floor rolling too painful, or you do not feel confident getting up and down, this upright method can be a game changer. Home gym users who lift, do calisthenics or follow online workouts can all use this routine to support recovery, reduce muscle tension and make their next session feel smoother. With a simple, affordable foam roller and a bit of wall space, you can turn your home into a practical recovery corner and build a sustainable, beginner-friendly self-massage habit.
Wall-assisted foam rolling gives you a low-stress way to look after your lats, chest and upper back without needing a massage therapist or a fully equipped studio. By choosing a suitable roller, setting up safely, and practising a handful of easy techniques, you can improve comfort, posture and performance right in your home gym. Start gently, listen to your body, and let this simple routine become a reliable part of your weekly recovery toolkit.