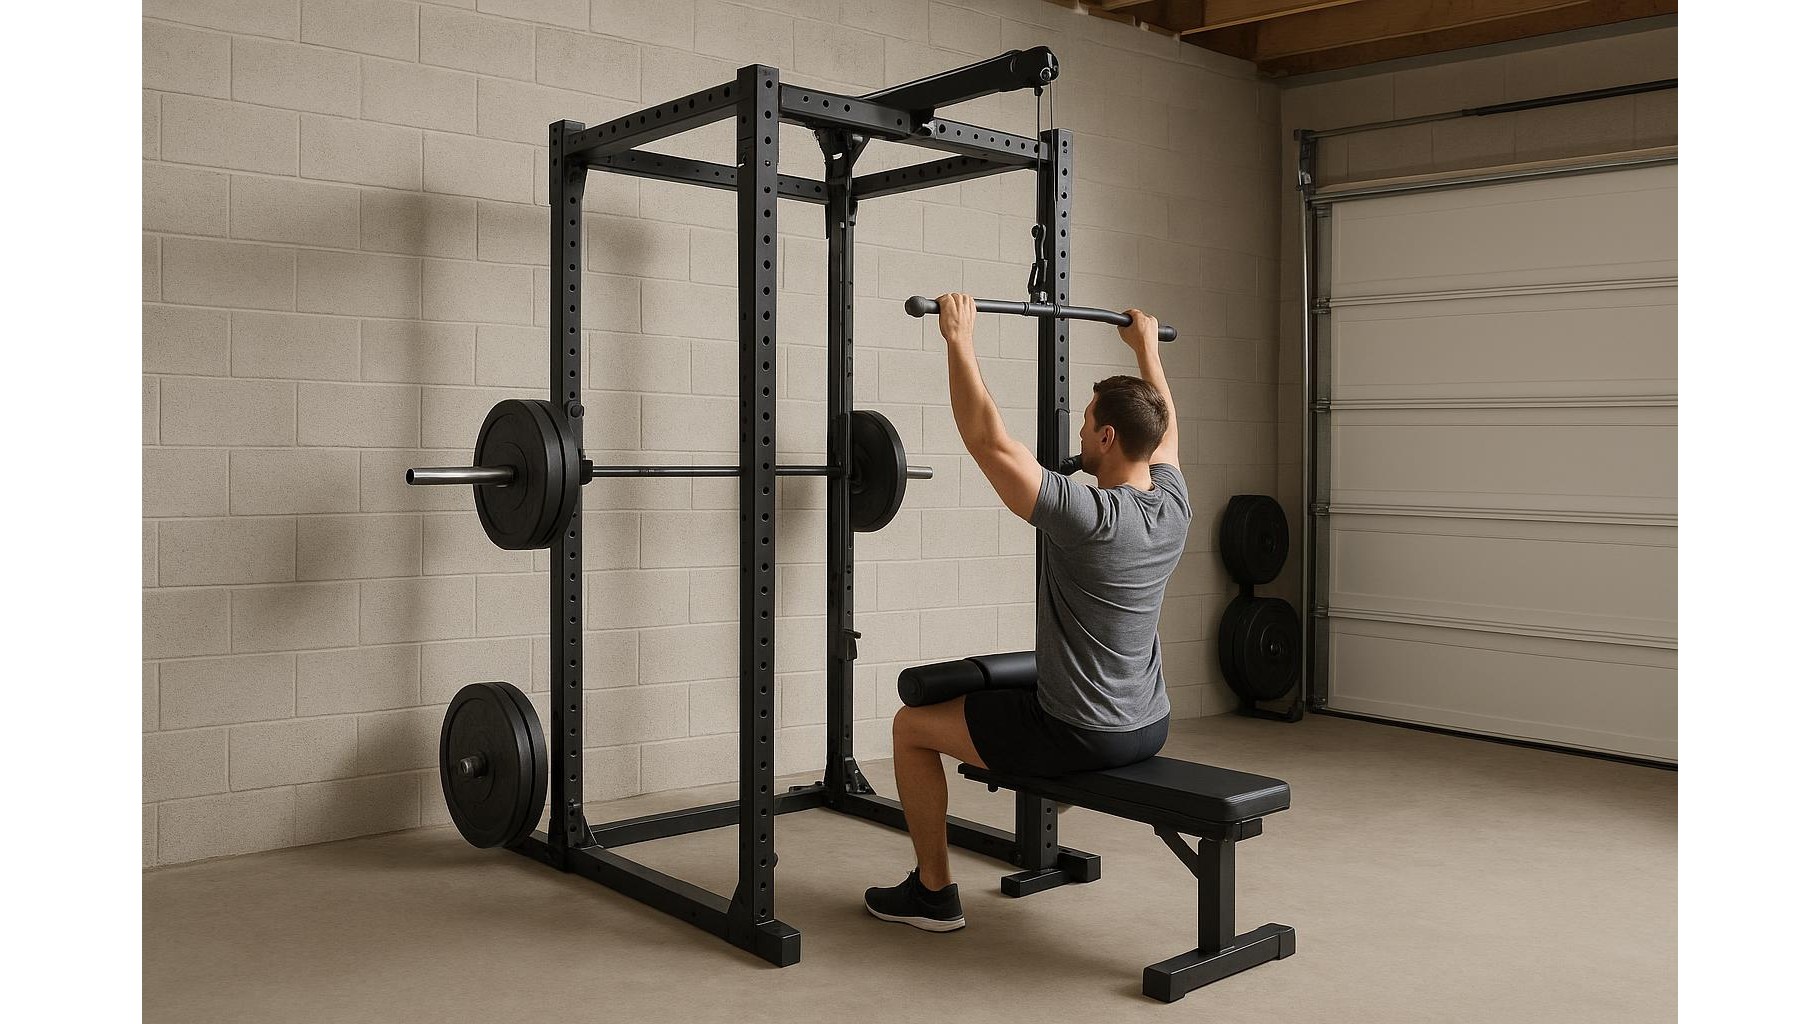
If you already own a solid power rack, adding a rack-mounted cable column is one of the most efficient upgrades you can make. Instead of dedicating precious floor space to a separate lat pulldown or functional trainer, these compact cable attachments bolt directly to your uprights and unlock pulldowns, rows, curls, triceps work and more. In a small home gym where every centimetre matters, the right attachment can effectively turn a basic rack and barbell setup into a near-complete home gym without blowing your budget.
What is a rack-mounted cable column and who is it for?
A rack-mounted cable column is a pulley system that attaches to the uprights of your existing rack instead of being a standalone tower. Typically, it lets you perform lat pulldowns, low rows, and a wide range of isolation exercises using weight plates as resistance. This makes it ideal for lifters who already base their training around squats, presses and deadlifts but miss the versatility of cables. Home gym owners in flats, garages or shared spaces benefit most, as the add-on uses the rack’s footprint rather than adding a new machine. It’s also a smart option if you want progression-friendly accessory work without buying a full-blown functional trainer.
Plate-loaded vs selectorised: choosing the right style
The first big choice is between plate-loaded and selectorised rack-mounted cable columns. Plate-loaded options use the same Olympic plates you already own, making them budget-friendly and easy to progress in small increments. Selectorised versions mimic commercial gym machines with a weight stack and pop-pin selection, offering faster changes and a cleaner look but at a higher cost and usually more weight to move or anchor. For most compact home gyms, a plate-loaded attachment will deliver all the key movements—pulldowns, seated rows, face pulls—without requiring a heavy, expensive stack. Whichever you choose, check that the loading method matches your existing plates and that the maximum capacity aligns with your strength level.
Key compatibility and installation checks
Before buying, ensure the cable attachment is compatible with your rack. Measure upright dimensions (typically 50×50 mm, 60×60 mm, or 75×75 mm) and check hole diameter and spacing. Many attachments are designed for specific brands or series, so confirm whether extra brackets or spacers are needed. Installation usually involves bolting the main column to the uprights, routing the cable around the pulleys, and attaching a loading pin or plate carriage. In a tight space, consider how the column will affect access to J-hooks and safety bars. You want to be able to switch quickly between barbell lifts and cable work without constantly disassembling your setup, so look for designs that sit flush against the rack and keep the floor clear.
Exercise versatility: from heavy pulldowns to isolation work
The real value of a rack-mounted cable column is the exercise variety it brings to a barbell-focused home gym. A high pulley lets you perform lat pulldowns, triceps pressdowns and high-to-low woodchoppers, while a low pulley enables seated rows, curls, lateral raises and hip abductions. Some systems offer adjustable pulley height for even more angles and unilateral work. This is particularly useful for body parts that can be hard to overload with just free weights, such as rear delts or smaller arm muscles. By combining heavy compounds in the rack with targeted cable accessories, you can build more balanced strength, improve joint health and reduce plateaus, all without expanding your footprint.
Space, noise and safety considerations in small rooms
In compact home gyms, details like ceiling height, noise and stability matter. Make sure the total height of your rack plus cable attachment allows for full overhead extension on pulldowns and triceps work. Because most rack-mounted cable systems are plate-loaded, the plates move, so use bumpers or rubber flooring to dampen sound and protect the floor. Anchor the rack securely—ideally by bolting it down or adding weight storage—to prevent tipping when you perform heavy rows or pulldowns. Regularly inspect the cable for fraying and check pulleys and carabiners for smooth rotation. A well-installed system will feel almost as stable as commercial equipment, with controlled movement and minimal sway even when you’re pulling close to your max.
Maximising value from your rack upgrade
To get the most from a rack-mounted cable column, organise your training so that barbell and cable work flow together efficiently. For example, pair squats with leg curls and extensions via low cable setups, or follow bench press with flyes and triceps pressdowns. Keep a small collection of cable attachments—such as a lat bar, straight bar and rope—within arm’s reach to minimise downtime. For many home gym owners, this single upgrade can delay or completely remove the need for a separate lat pulldown machine or functional trainer, saving both money and space. With thoughtful setup and exercise selection, a compact cable column truly transforms a basic rack into a full home gym capable of delivering long-term, progressive training.
In summary, a well-chosen rack-mounted cable column gives you big-gym versatility in a small footprint. By paying attention to compatibility, installation, exercise variety and safety, you can turn your existing rack into a highly capable home gym hub that supports both heavy compound lifts and precise isolation work, without needing to buy a separate cable tower.