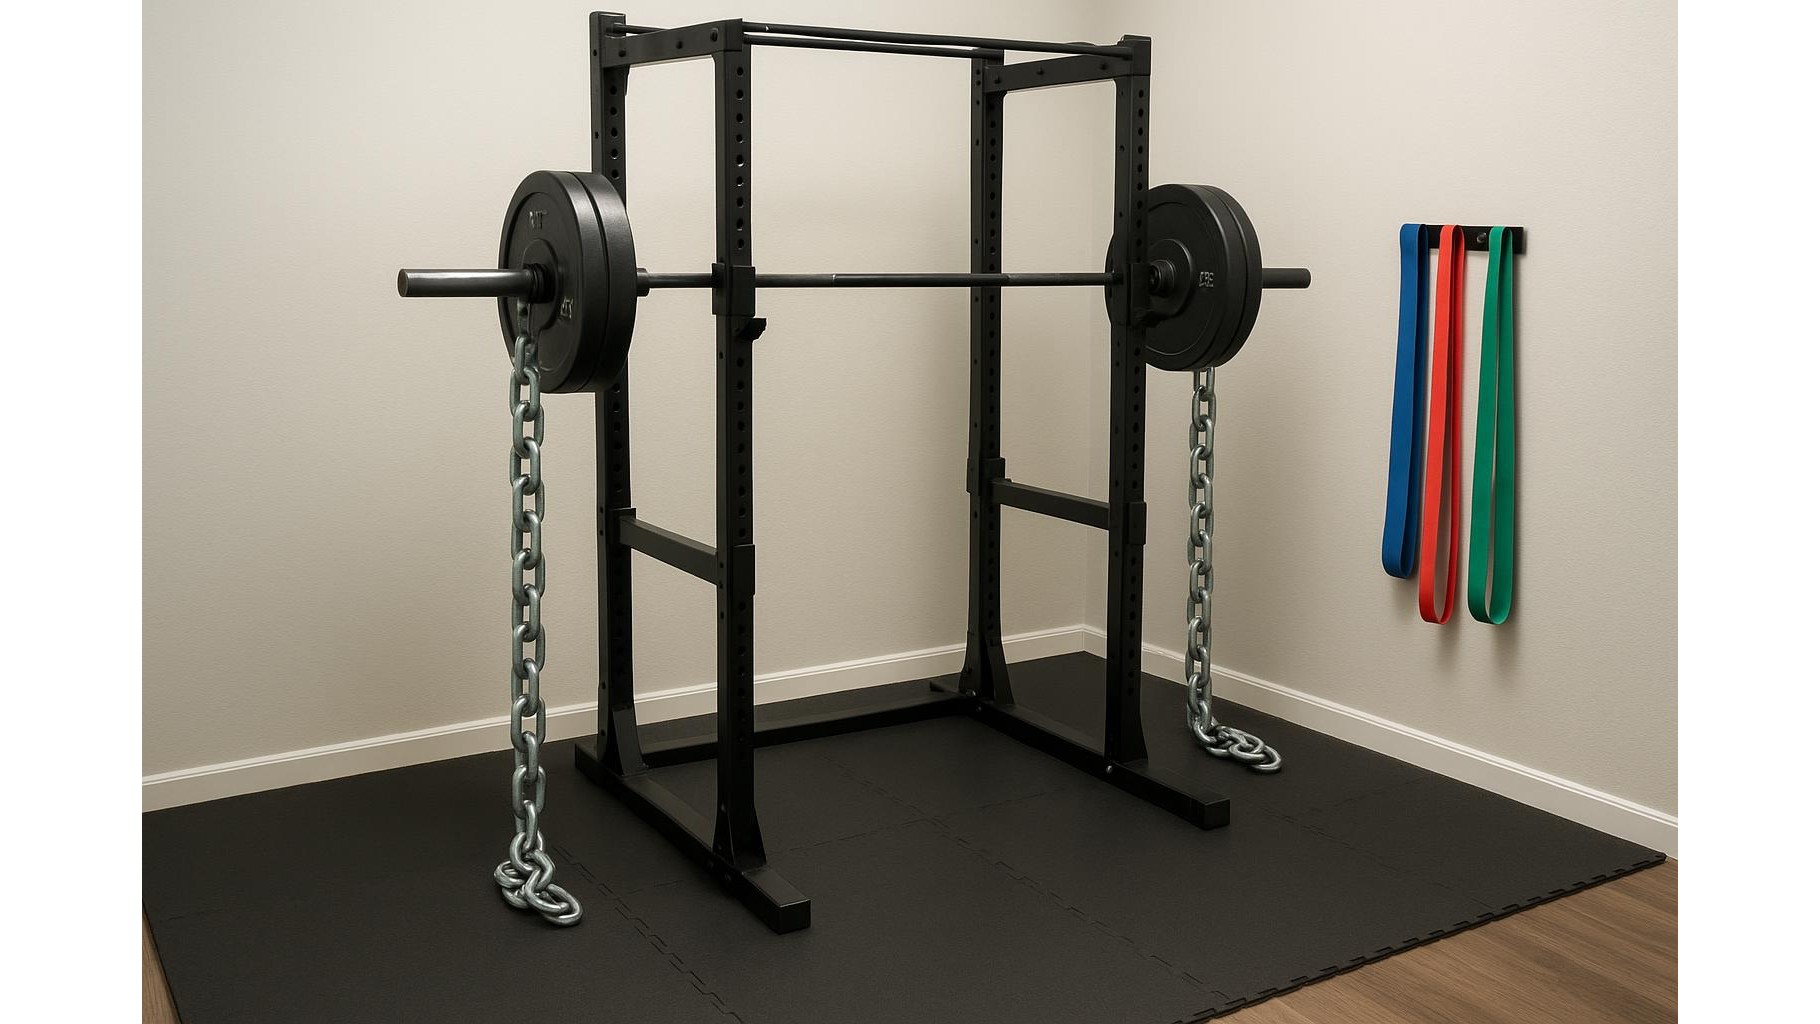
Adding chains and resistance bands to your barbell lifts is one of the most effective ways to build strength and speed in a home gym. This type of “accommodating resistance” changes the load through the range of motion, making the lift lighter where you are weak and heavier where you are strong. In a small space, however, it’s essential to think about safety, floor protection and how to attach everything securely to your barbell and rack.
Choosing safe chains and bands for home use
In a home gym, prioritize durable, predictable equipment over the cheapest option. For chains, look for steel lifting chains with a consistent link size, usually in the 10–13 mm range, and avoid hardware-store chains that may not be rated for dynamic loading. You’ll also need sturdy leader chains or carabiners so you can adjust the hanging length. For bands, choose a layered latex resistance band set with multiple thicknesses so you can match tension to the lift and your strength level. Store bands away from sunlight and sharp edges, and inspect both chains and bands before each session for rust, cuts, or thinning to reduce the risk of failure mid‑lift.
Protecting your bar, rack and floor
Accommodating resistance can be tough on home gym flooring and on lighter racks. To avoid damage, use a thick rubber mat or lifting platform under where the chains will pile up or where bands touch the floor. When using bands, always loop them around the bottom of the rack or around band pegs that are designed to take tension; never loop them around sharp corners that could cut the latex. If your rack is not bolted down, keep band tension moderate so it doesn’t tip or lift the frame. For chains, ensure they are attached to the bar via secure collars or dedicated chain holders, and make sure the ends of the chains rest gently on the floor at the bottom of the lift to soften impact and reduce noise.
Safe band and chain setup on the squat
For the barbell squat, start with your usual warm‑up weight before adding bands or chains. With bands, attach them low on the rack or pegs, then loop them over the sleeves of the bar so they are just slightly stretched at the bottom and tight at the top. This gives you more resistance as you stand up without pulling you forward. For chains, hang them from the sleeves using a shorter leader chain so that roughly half the chain is on the floor at the bottom and mostly off the floor at the top. Begin with very light accommodating resistance (for example, 5–10% of your bar weight in chains or band tension) and focus on controlled depth, bracing and staying balanced over mid‑foot before progressing heavier.
Using bands and chains on the bench press
The bench press is especially well suited to accommodating resistance in a home gym. For bands, anchor them under heavy dumbbells, sandbags or band pegs directly beneath the bar path to keep tension vertical. The bands should be slightly loose at the chest and tight at lockout, encouraging you to press explosively while maintaining control on the way down. For chains, attach them near the ends of the bar so they hang straight down and do not swing; adjust the length so that some links unload onto the floor when the bar touches your chest. Always use safety arms or spotter bars on your rack and avoid max‑effort attempts until you have several sessions of experience with the new setup.
Deadlifts with accommodating resistance at home
For the deadlift, bands and chains can increase lockout strength without overloading the start from the floor. With bands, loop them over the bar and anchor them either to heavy kettlebells/dumbbells or to pegs on your platform so the pull is straight down; make sure the anchors cannot slide or tip. For chains, drape them over the sleeves so that most of the chain rests on the floor at the start and gradually comes off the ground as you stand up. Begin with submaximal weights, focusing on a neutral spine, tight lats and a smooth lockout. Because deadlifts generate more noise and vibration, ensure your flooring is well protected and avoid dropping the bar with chains attached to prevent shock to your equipment and neighbour‑unfriendly noise.
Used correctly, chains and resistance bands can transform simple barbell lifts into powerful tools for building strength and speed in your home gym. By choosing reliable equipment, protecting your floor and rack, and learning basic setups for the squat, bench and deadlift, you minimise risk while gaining the benefits of accommodating resistance. Start light, prioritise technique and progress gradually, and you’ll enjoy a stronger, more versatile barbell routine without compromising safety or your training space.