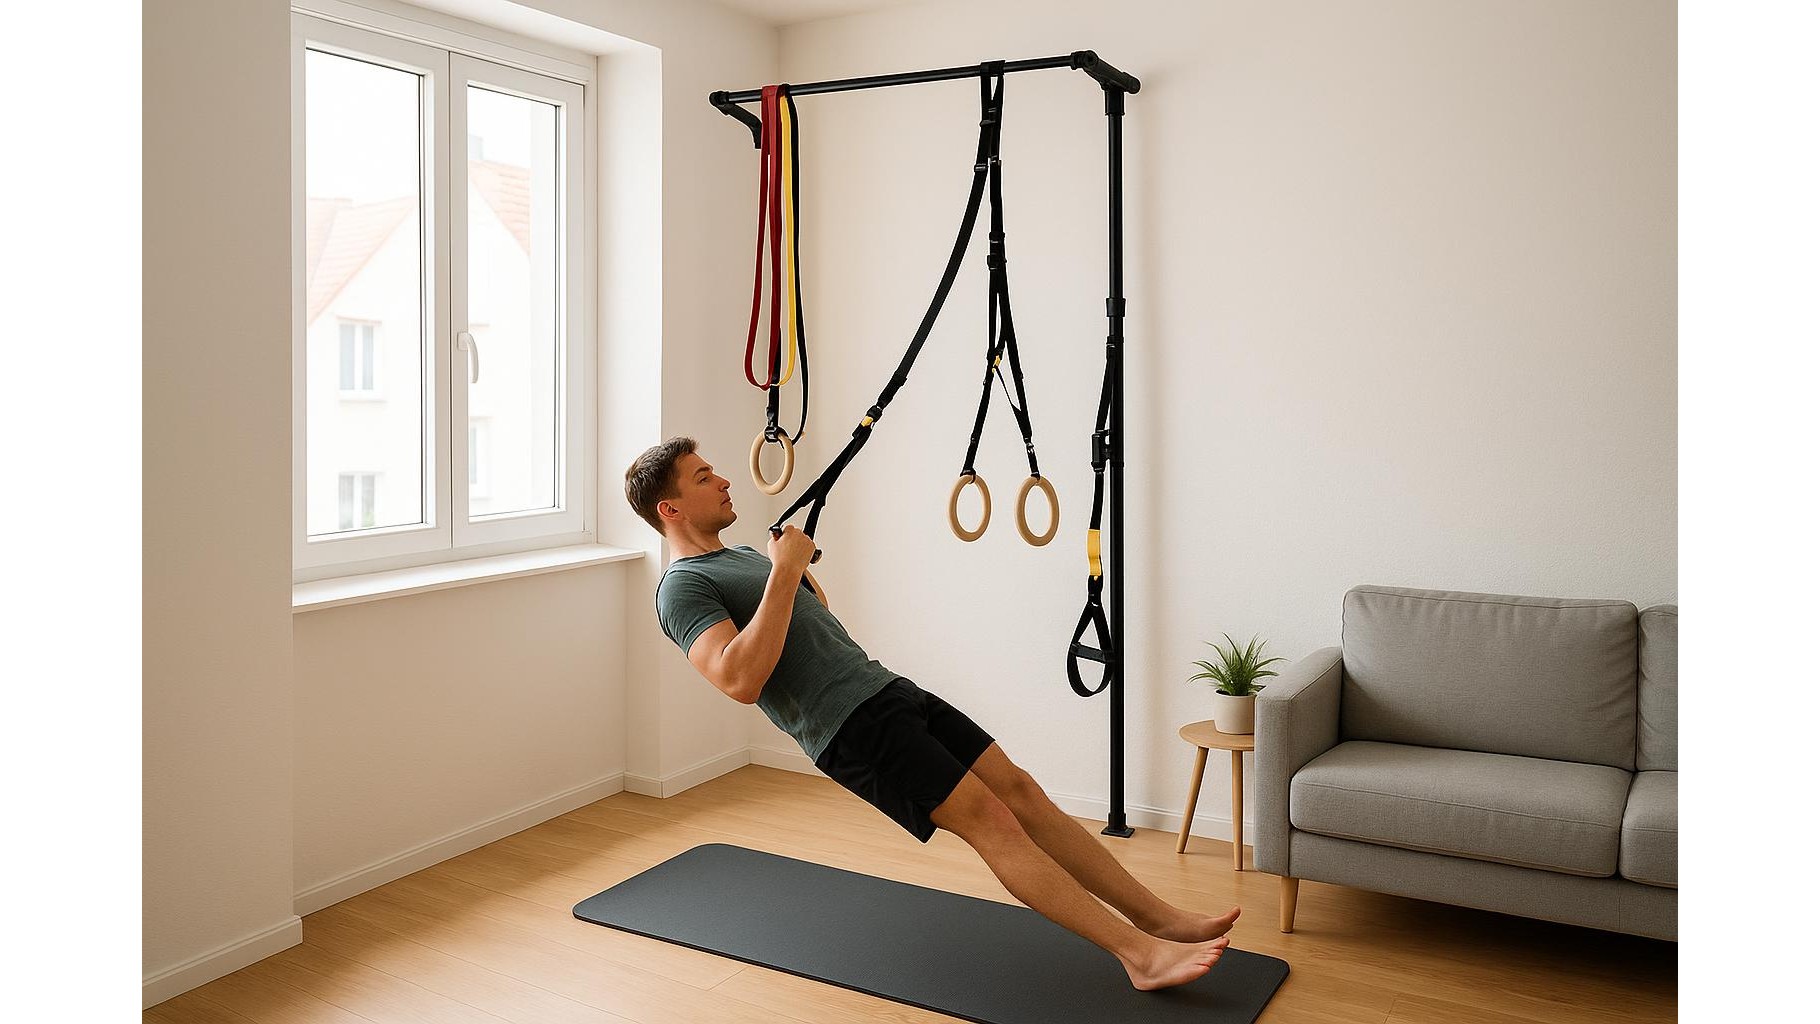
Creating a mini home gym in a small flat is absolutely possible if you start with a solid tension pull-up pole. A floor-to-ceiling bar gives you a vertical anchor point for pull-ups, rows and core work, and it also becomes the hub for resistance bands, gymnastic rings and suspension trainers – all without drilling into walls or ceilings. In this guide, you’ll learn how to choose and install a safe tension pole and how to combine it with simple accessories to build a versatile home gym station in almost any room.
Choosing a safe floor-to-ceiling tension pull-up pole
The tension pole is the heart of your no-drill home gym, so prioritise safety and load rating. Look for a model with a wide support plate at both ends, non-slip rubber pads and a clearly stated maximum user weight. High-quality tension poles use thick steel tubing, internal locking mechanisms and anti-rotation designs to prevent twisting during pull-ups. Check that the bar can adjust to your ceiling height and that the manufacturer specifies use between solid floor and ceiling surfaces (not weak plasterboard alone). Avoid ultra-cheap doorway-only bars for this purpose; you want a true floor-to-ceiling tension pole built for vertical bracing, tested for dynamic loads from pull-ups, leg raises and band work.
Installing your tension pole safely without drilling
Proper installation is what turns a tension pull-up pole into a reliable home gym station. Start by measuring the distance from floor to ceiling and pre-setting the bar close to that length before standing it upright. Position the lower plate on a firm, even surface – tile, concrete or solid wood – and avoid thick, squishy carpets that can compress. As you extend the pole vertically, keep it perfectly straight and follow the manufacturer’s torque or twist instructions to reach the recommended pressure. Tighten gradually, checking that the bar does not wobble or rotate when you pull sideways. Once it feels solid, test it with low-intensity hangs and partial bodyweight before committing to full pull-ups. Re-check tightness weekly and after any heavy sessions to maintain safety.
Adding resistance bands for push, pull and leg training
With the pole installed, the fastest way to expand your exercise menu is to add a resistance band set with multiple tensions, handles and a door anchor. Loop long bands around the bar to create scalable assistance or resistance for pull-ups, rows, presses and squats. For example, you can perform assisted pull-ups by looping a heavier band over the bar and placing a knee or foot in the loop, or do standing rows by stepping on the band and pulling towards the bar. Lighter bands are ideal for warm-ups, shoulder prehab and core work like Pallof presses anchored at chest height. Because bands are quiet and compact, they complement the tension pole perfectly, turning one vertical support into a full-body strength station that fits in a corner.
Using rings and suspension trainers on the pole
To unlock even more exercises, clip gymnastic rings or a suspension trainer over the tension pole. Rings offer an unstable handle that challenges your shoulders and core while allowing natural wrist rotation during rows, dips and push-ups. A suspension trainer with adjustable straps lets you train horizontal and angled rows, chest presses, face pulls, single-leg squats and core moves like fallouts and pikes. Always make sure the straps sit in the centre section of the bar to avoid sliding, and double-check that the tension pole is rated for the combined dynamic load of your bodyweight and movement. Keep your feet slightly forward or under you to reduce peak forces as you learn new exercises, and progress slowly to harder angles over time.
Designing a balanced mini home gym routine around your pole
Once your tension pole, bands, rings and suspension trainer are in place, you can build a balanced home workout plan using just this compact setup. Aim to cover key movement patterns: vertical pulls (pull-ups or band-assisted pull-ups on the pole), horizontal pulls (ring or suspension rows), horizontal pushes (push-ups or suspension chest presses), lower body (banded squats, split squats and hip hinges) and core (hanging knee raises, band rotations, suspension planks). Arrange them into two or three short circuits of 5–8 exercises, training three times per week. Because this mini home gym station sets up and packs away quickly, it suits small spaces and busy schedules while still allowing meaningful strength and mobility progress.
By starting with a solid floor-to-ceiling tension pull-up pole and layering in resistance bands, rings and a suspension trainer, you can transform a single corner of your home into a full-body training station without drilling a single hole. Careful product selection, cautious installation and smart exercise choices will give you a safe, quiet and highly versatile setup for pull, push, leg and core work in even the smallest flat.