Filming your home workouts is one of the simplest ways to improve technique, but rewatching raw video often isn’t enough. To really understand your squat, press or hinge mechanics, you need some way to overlay lines and angles on screen. While there are paid coaching apps, a surprising number of browser-based tools and simple extensions let you draw on your videos, take rough angle measurements and compare reps directly from your laptop or desktop browser.
Why angle overlays help your squat and hinge
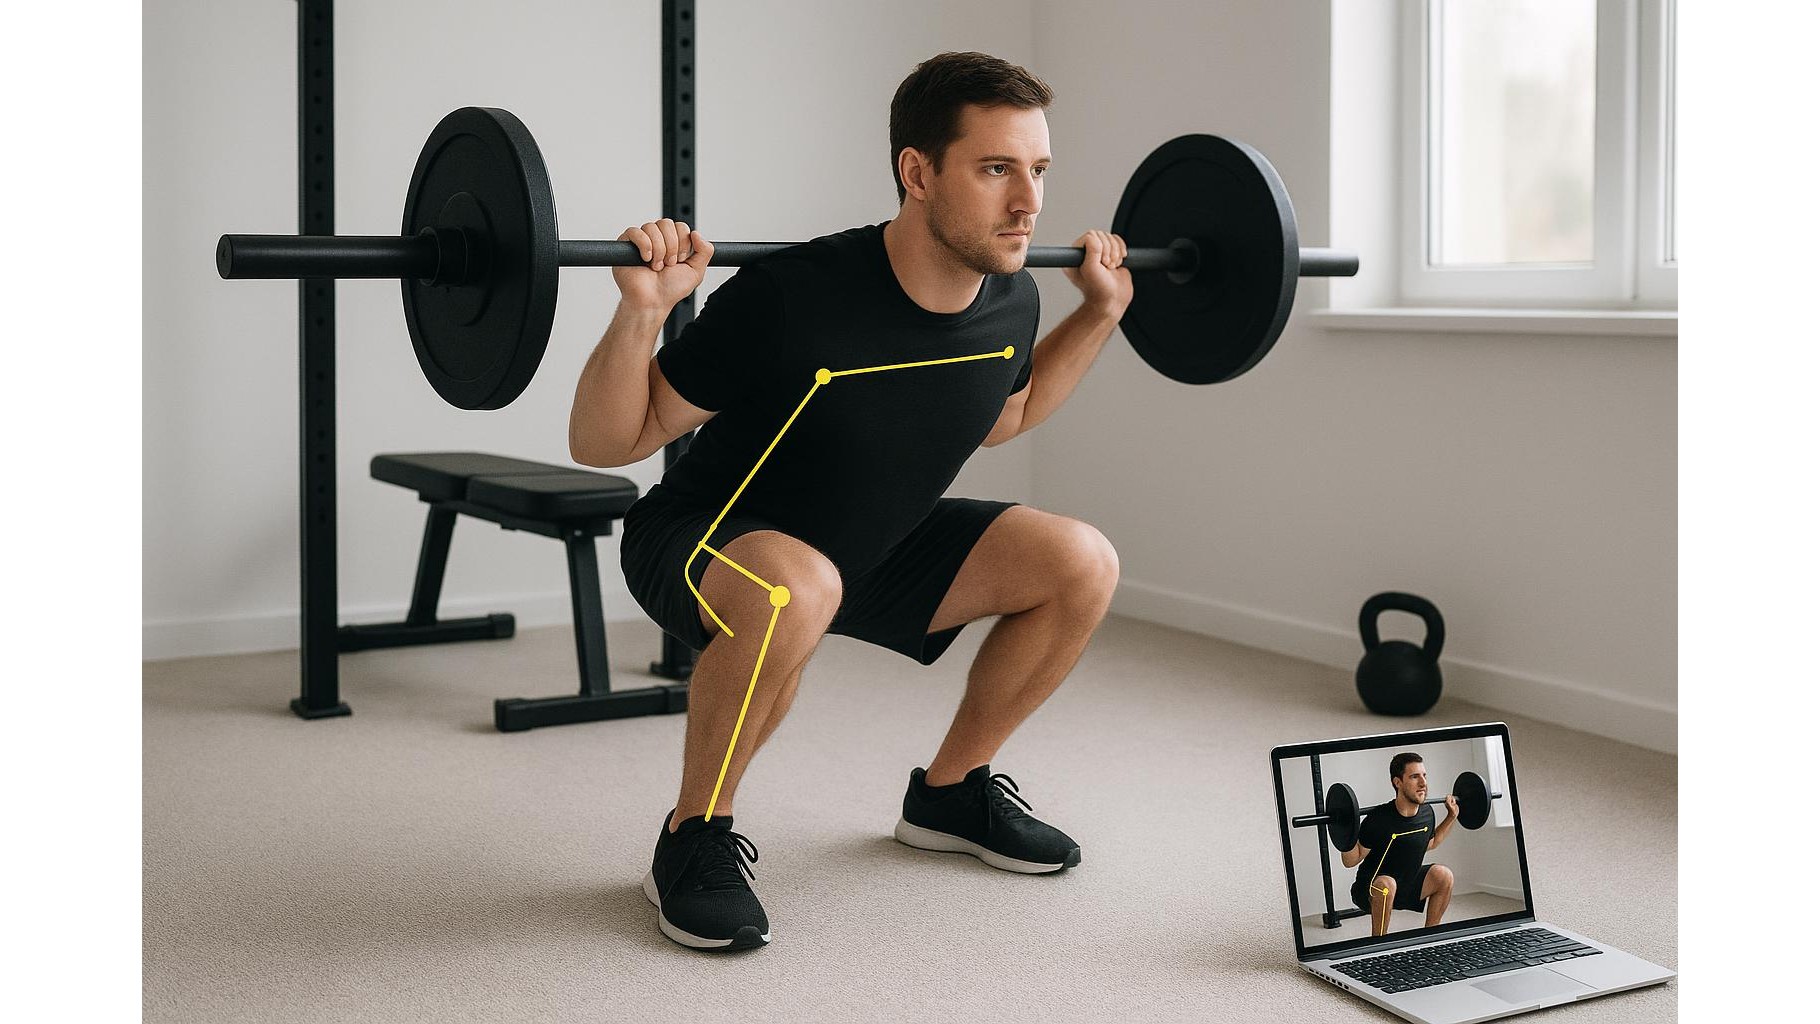
Most home lifters struggle with body awareness: it’s hard to feel whether your knees are tracking over your toes or if your back is rounding in the bottom of a deadlift. Using angle overlays on your workout clips solves this by turning each frame into simple geometry. Draw a line from hip to knee to ankle and you can see if your knee angle is too closed at the bottom of a squat, or if your shins are shooting forward. Add a line from shoulder to hip to knee during hinges and you can spot a collapsing torso, excessive lumbar flexion or under-used hips. Even a basic browser annotation tool can give you enough visual feedback to adjust stance width, bar path and depth from session to session.
Using free browser video players with drawing tools
The easiest way to start is to upload your training videos to a site that runs in your browser, then use built-in or companion drawing tools to mark them up. Many web-based players now support frame-by-frame scrubbing, which lets you pause at key positions in your squat or press. You can then use a basic annotation layer to draw straight lines along your shins, torso or barbell path, and add rough angle indicators at the knee, hip or elbow. This method works best when you film from consistent camera angles (side view for hinges, three-quarter view for squats, pure side for pressing), and when you keep the lens roughly at hip height so your lines align cleanly with your joints.
Browser extensions for quick on-screen measurements
If you prefer to keep videos on your computer and play them locally, consider browser extensions or add-ons that let you draw directly on any tab. These tools typically add a floating toolbar with a straight line tool, a protractor-style angle tool and an undo button. Play your video in a browser tab, pause at the bottom of a squat or the lockout of an overhead press, and activate the overlay. Draw one line down your torso and another along your thighs to assess hip depth; or measure the angle between forearm and upper arm at the bottom of a bench press to check elbow flare. While the angle readings are approximate, they’re more than accurate enough to track progress in technique across weeks.
Practical workflow for squats, presses and hinges
To get consistent, useful data from these form-check tools, it helps to build a simple routine. First, film every working set from the same position and distance, ideally with your whole body in frame and good lighting. After training, load each clip in your browser and pick one or two key positions to analyse: bottom of squat, mid-shin on deadlift, bottom and lockout of presses. Use lines to mark the bar path, then compare it rep by rep: is it drifting forward on the way up, or staying stacked over mid-foot? Use angle tools to get a consistent reading for knee, hip or shoulder positions and jot down notes. Over a few weeks, you’ll build a visual log of technique improvements that complements your training journal.
Limitations and tips for better accuracy
Browser-based overlays are not magic, and they do have limitations. Perspective distortion from filming at odd angles can make your angle measurements less reliable, so keep the camera perpendicular to your movement plane whenever possible. Avoid wide-angle lenses at very close distance, and use clear, high-contrast clothing to make joints easier to spot. Remember that these tools are a guide, not an absolute judge of technique; if an angle reading looks off but the movement feels strong and pain-free, treat it as one data point among many. Whenever you make larger programming changes, consider sharing your annotated clips with a coach or experienced lifter who can interpret the lines and angles in the context of your goals and anatomy.
Overlaying angles and lines on your home workout videos transforms casual filming into a powerful feedback loop. With a laptop, a browser and simple annotation tools, you can assess squats, presses and hinges far more objectively than by eye alone, without paying for expensive apps. By standardising your camera setups, analysing a few key positions each session and tracking technique notes alongside your training log, you’ll gradually build more efficient, safer patterns—and get more results from every rep you do in your home gym.