If you only ever use your foam roller for a few minutes of rushed recovery work, you are leaving a powerful home training tool on the table. With smart programming, a simple foam roller can create instability, increase core engagement and turn bodyweight drills into a demanding full body workout. This 40‑minute foam roller strength flow blends stability training, anti‑rotation work and controlled tempo exercises into a joint‑friendly session you can do in any home gym.
Why your foam roller is a strength tool, not just for recovery
A quality foam roller is essentially a lightweight, portable cylinder that can act as an unstable bench, slider or barbell substitute. When you press hands or feet into the roller, your stabiliser muscles in the shoulders, hips and core work much harder to keep you steady. This makes familiar movements like glute bridges, planks and push‑ups significantly more challenging without adding external load. A medium‑to‑high density roller also gives you enough support to perform seated and supine work comfortably, while still offering the traditional benefits of self‑myofascial release before and after your home workout.
Setting up your 40‑minute full body foam roller flow
Structure this 40‑minute foam roller workout as four 8‑minute blocks: core, lower body, upper body and integrated flow. Begin with 3–5 minutes of rolling your upper back, glutes and quads to improve tissue quality and gently warm the joints. Then move into timed sets of 40 seconds work, 20 seconds rest. Keep the tempo slow and controlled, focusing on smooth breathing and maintaining tension. Because the roller adds instability, you do not need heavy weights to create a strong stimulus. Aim for 2–3 rounds per block, resting 60–90 seconds between blocks if needed, and keep a water bottle and exercise mat close by for comfort.
Core and anti‑rotation: teaching your trunk to resist movement
The first block targets core stability and anti‑rotation strength. Start with a forearm plank where your elbows rest on the foam roller and your feet are on the floor; this increases the demand on your shoulders and deep core. Follow with a dead bug variation: lie on your back, hold the roller vertically between your hands and knees, and actively squeeze it while you extend opposite arm and leg. Finish with side plank roll‑outs, placing your top hand on the roller and gently gliding it away from your body without letting your hips sag. These drills train your trunk to resist unwanted twisting and arching, which carries over directly to safer squats, presses and everyday lifting.
Lower body flow: glutes, hamstrings and hips on an unstable base
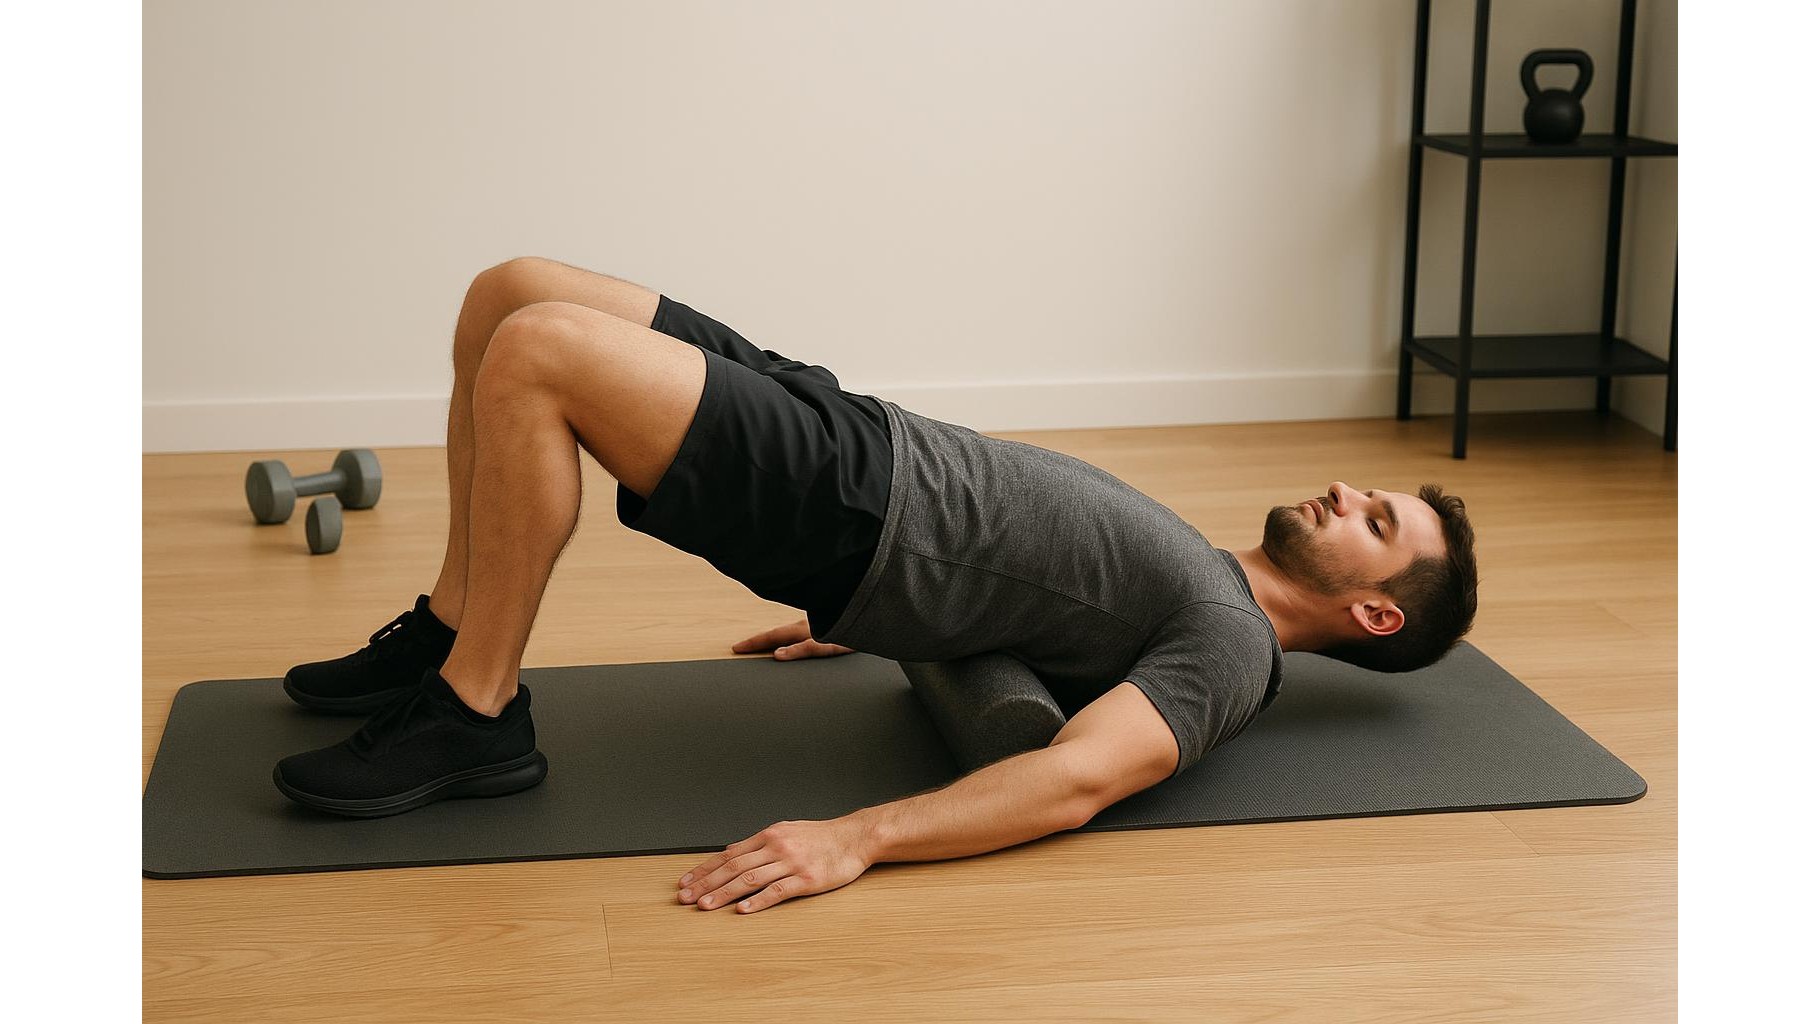
For the lower body, the roller becomes an unstable footrest that lights up your glutes and hamstrings. Begin with foam roller glute bridges: lie on your back, heels on the roller, and drive your hips up while keeping ribs down. Progress to single‑leg bridges with one heel on the roller and the other leg extended, maintaining straight alignment from knee to shoulder. Add hamstring curls by starting in a bridge and slowly rolling the foam roller away and back using your heels. Finish with a supported split squat, placing your back shin lightly on the roller to encourage balance and control. This sequence builds hip strength and stability with far less joint stress than heavy barbell work.
Upper body and shoulder stability: pushing and bracing with the roller
In the upper body block, the foam roller challenges your shoulder stability and pushing strength. Try elevated push‑ups with both hands on the roller, keeping elbows tucked and chest moving as one unit. For beginners, keep knees on the floor; for more advanced lifters, move to full push‑ups or slow negatives. Next, perform kneeling roll‑outs, starting with the roller under your forearms and gently extending your body forward while maintaining a neutral spine, similar to an ab wheel but more forgiving. Finish with a prone Y‑raise: lie face down, hands resting on the roller in front of you, and lift your arms into a Y‑shape to engage the upper back and postural muscles that are crucial for healthy pressing.
Putting it all together: 40‑minute foam roller strength flow
Wrap your full body foam roller workout into a smooth flow by linking one exercise from each block: for example, roller forearm plank, single‑leg bridge on the roller, push‑ups with hands on the roller, then kneeling roll‑outs. Move from one to the next with minimal rest, focusing on steady breathing and strict form. This integrated circuit elevates heart rate while reinforcing stability from head to toe, giving you both strength and conditioning in a compact session. Cool down with gentle rolling on your lats, glutes and calves, using slow passes and relaxed breathing to help your body shift into recovery mode. Done 2–3 times per week, this routine turns a simple tool into a versatile, joint‑friendly strength system.
This 40‑minute foam roller strength flow proves you do not need a room full of metal to build strength, control and resilience at home. By turning instability into a training partner, you challenge your core, hips and shoulders in ways traditional machines cannot match, while keeping impact low and joint stress manageable. Commit to moving slowly, focusing on quality over quantity, and your foam roller will evolve from a forgotten recovery prop into one of the most valuable pieces in your home gym arsenal.