Training on a home stair stepper is one of the most efficient ways to build glute strength and calf endurance while keeping impact on your joints low. With smart interval programming and careful attention to knee‑friendly form, you can turn even a compact home stepper into a powerful conditioning tool. This guide walks you through technique cues, glute‑ and calf‑focused protocols, and practical tips for staying consistent without beating up your knees.
Why a stair stepper is perfect for low‑impact intervals
A stair stepper mimics climbing stairs but controls the movement to stay low impact, making it kinder to your knees than running or jumping. The continuous stepping pattern challenges your cardiovascular system, glutes, quads and calves without the jarring heel strikes of road work. Because resistance and step speed are easy to adjust, you can create interval sessions that alternate short bursts of intensity with recovery periods, boosting fitness in less time. Steady handrails and a small footprint also make steppers ideal for home gyms where space and noise are a concern.
Knee‑friendly set‑up and technique cues
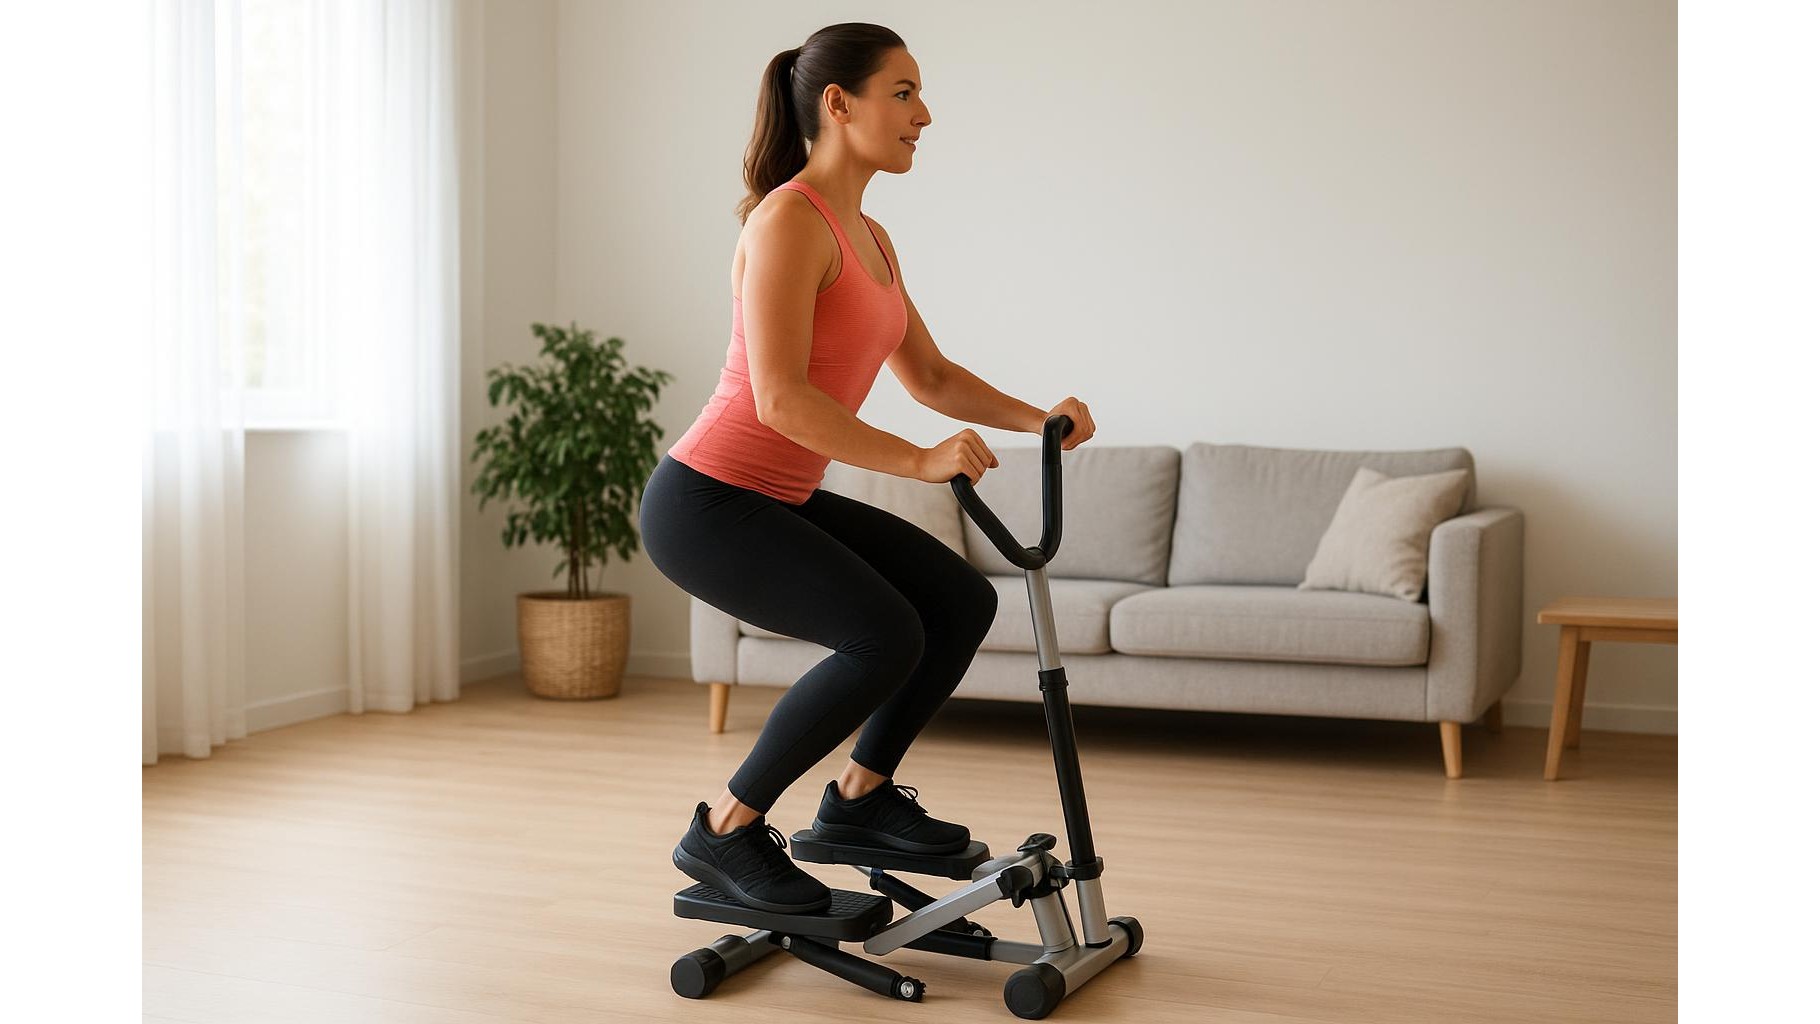
To protect your joints, start by setting resistance so you can maintain a smooth, controlled stride. Keep your chest up, ribs stacked over hips and eyes forward rather than staring down at the pedals. Place your whole foot on the step instead of letting the heels hang off, which can overload the calves and Achilles. Aim for a soft micro‑bend in the knees at the bottom of each step; never lock out or snap the knee straight. Lightly rest your hands on the rails for balance, but avoid leaning your bodyweight onto them, which increases shear forces at the knee and reduces glute activation. If you feel pressure at the front of the knee, shorten your range of motion slightly and slow the tempo.
Interval ideas to target the glutes
For glute‑focused intervals, think about driving through the heel and squeezing your hips at the top of each step. Begin with a 5‑minute warm‑up at an easy pace. Then try 8–10 rounds of 30 seconds at a challenging but sustainable pace, followed by 60 seconds of very light stepping. To emphasise the posterior chain, hinge your torso slightly forward from the hips while keeping your back neutral, and avoid letting the knees collapse inward. Advanced users can experiment with short blocks of “marching” steps, lifting one knee a bit higher for 10–15 seconds before switching sides, which adds a unilateral challenge for the glutes. Finish with 3–5 minutes of easy stepping and gentle hip and hamstring stretches.
Building calf endurance without overloading the joints
Calf endurance comes from consistent, moderately long bouts of stepping with mindful foot placement. After your general warm‑up, shift focus to pushing the pedal down through the ball of the foot while still keeping the heel in light contact to avoid excessive strain. Try 3–4 blocks of 5 minutes at a steady, moderate pace, separated by 2‑minute easy recoveries. You should feel a progressive burn in the calves without sharp pain or cramping. To vary the stimulus, you can alternate 60 seconds of slightly quicker steps with 60 seconds at a slower cadence, maintaining the same resistance. Stretch your calves against a wall or on a step after each session to maintain ankle mobility and support knee health.
Weekly programming and progression at home
A balanced home stair stepper program blends glute power, calf endurance and joint‑friendly conditioning. Beginners might start with 2–3 sessions per week of 15–20 minutes, focusing on learning technique and gentle intervals. Intermediates can build to 3–4 days per week, alternating a glute‑focused interval day, a calf‑endurance day and a mixed‑intensity conditioning day with shorter work‑to‑rest ratios such as 40 seconds on, 20 seconds off. Progress by increasing total time first, then slightly raising resistance or intensity, maintaining at least one easy recovery session each week. Listen to your knees: mild muscle fatigue is fine, but persistent joint soreness is a signal to reduce volume or intensity.
Accessories and simple upgrades for better comfort
A few low‑cost accessories can make your stair stepper workouts more comfortable and sustainable. Well‑cushioned, supportive training shoes help distribute pressure across the foot and reduce stress on knees and ankles. A basic floor mat under the stepper cuts noise and protects your flooring, which is particularly useful in apartments. If your model allows, adjust handle height so your shoulders can stay relaxed rather than shrugged. Pairing the stepper with a simple heart‑rate monitor or fitness watch lets you track interval intensity and recovery over time. Combine these upgrades with consistent practice and knee‑friendly form, and your home stair stepper becomes a powerful tool for sculpting glutes and calves while keeping your joints happy.
Used thoughtfully, a home stair stepper offers a flexible way to build strength and endurance without pounding your knees. By dialling in posture, choosing smart interval structures and paying attention to how your joints feel from session to session, you can steadily progress your glute and calf development. Keep sessions regular, adjust intensity gradually and treat good form as non‑negotiable: in the long run, that is what delivers results and keeps your home workouts both safe and effective.