After a heavy home lifting session, your hands and forearms often take the biggest beating: think pulling from a barbell, hanging from a pull‑up bar, or long sets of kettlebell swings. A DIY hand and forearm ice bath can be a simple, cheap way to manage local soreness and inflammation without the full‑body shock of a cold plunge. In this guide, we’ll see how to set up small ice baths at home, how to use them safely, and when localized cooling is actually useful for lifters—and when it’s better to skip the cold.
Why localized ice baths can help lifters
Localized cold water immersion for the hands and forearms can reduce perceived pain, calm down tendon irritation from gripping work, and limit excessive swelling after high‑volume training. Cooling the tissues narrows blood vessels and slows local metabolic activity, which may help when joints or tendons feel hot and angry after rows, pull‑ups, or heavy deadlifts. Unlike whole‑body ice baths, a small hand setup is easier to tolerate and doesn’t crush your nervous system or recovery. That makes it a practical option for home gym athletes who want some relief without turning every session into a biohacking experiment. Still, it’s a tool—not magic—and it works best when paired with smart load management and solid sleep.
Simple DIY setup for hand and forearm ice baths
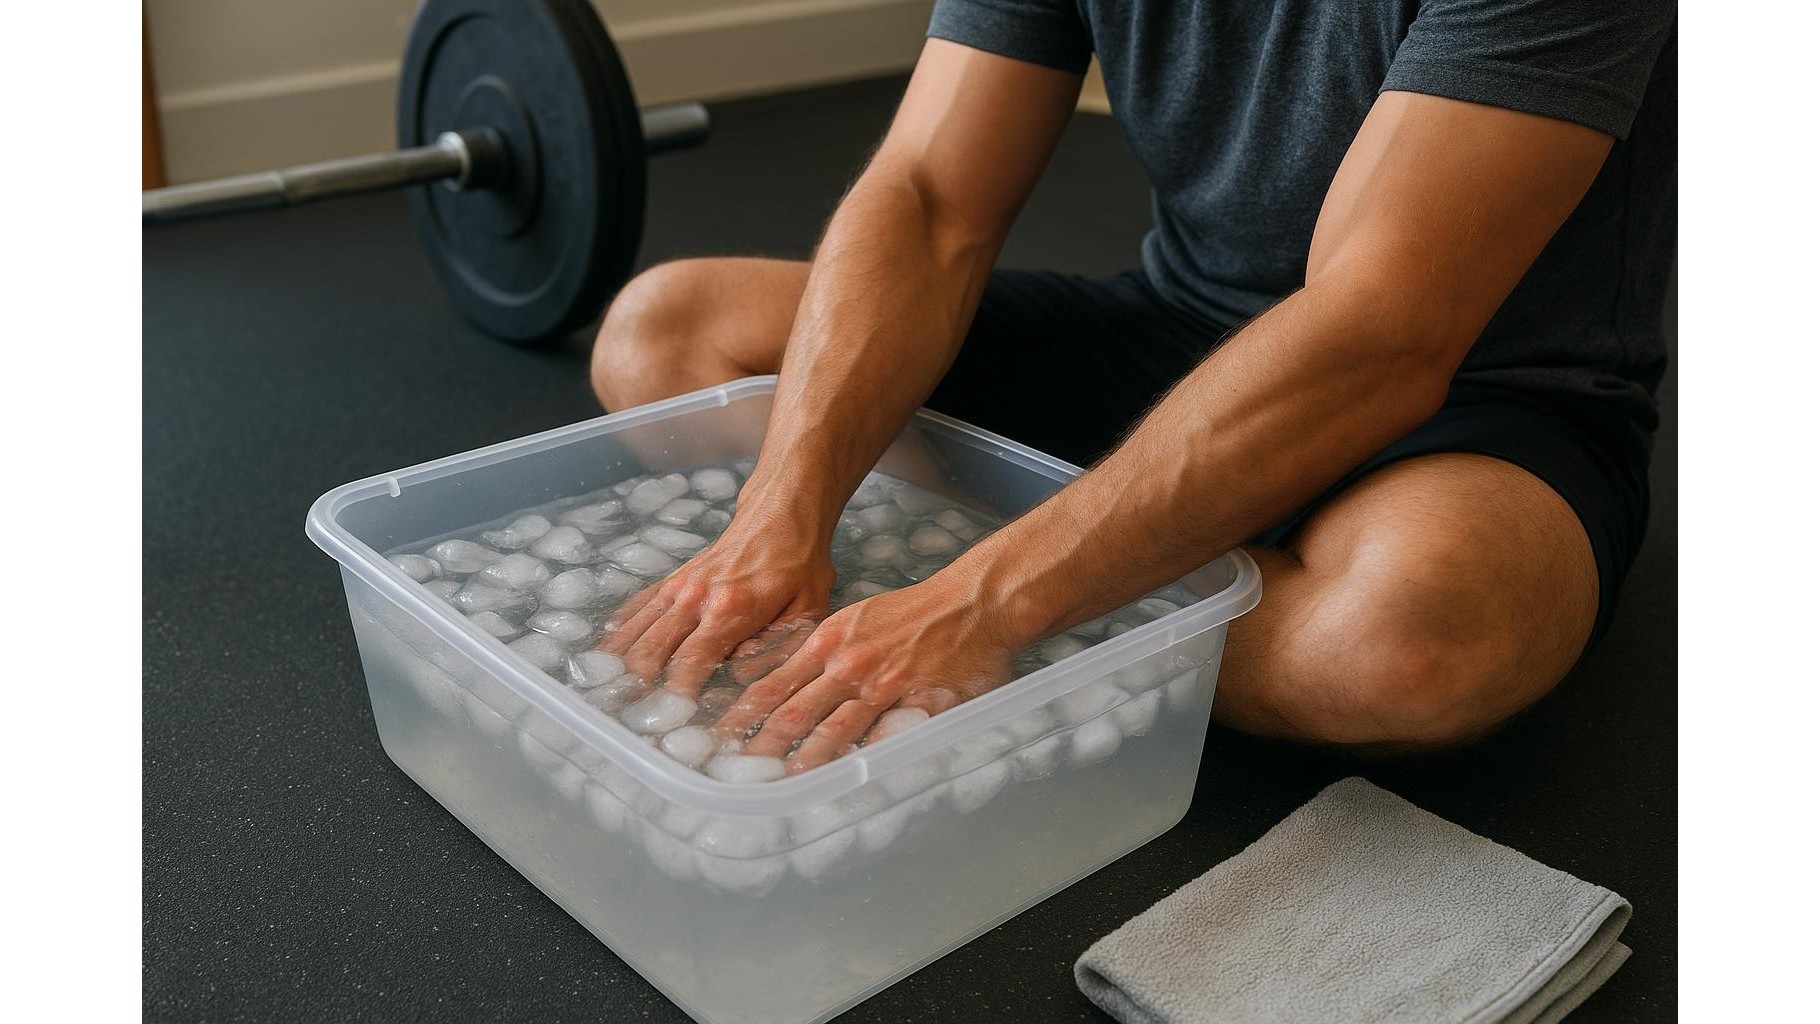
You don’t need anything fancy to create a home ice bath for your hands and forearms. Start with a sturdy bucket, storage tub, or sink deep enough to submerge from fingertips to just below the elbow. Fill it with cold tap water, then add a few trays of ice; aim for water that feels very cold but not unbearable. Keep a towel nearby and, if possible, a timer so you don’t stay in too long. You can also keep a second bucket with warm water to alternate at the end for comfort. The key is consistency and practicality: set the bucket near your rack or in the bathroom so it’s easy to use right after training, when you’re most likely to follow through on your recovery routine.
How and when to use hand and forearm cold exposure
For most lifters, 5–10 minutes of cold immersion for hands and forearms is enough. After your last set, gently rinse sweat off, then submerge your hands and forearms up to just below the elbow. Expect the first 60–90 seconds to feel sharp and uncomfortable, then it usually settles. You can perform light finger movements in the water to keep joints mobile. Use ice baths on days when your grip and forearms feel overworked—after high‑rep deadlifts, heavy rowing sessions, or long calisthenics practice. Limit sessions to a few times per week to avoid numbing every bit of feedback your body sends. Avoid very late‑night immersions if cold tends to make you more alert and disrupt your sleep.
Safety guidelines and when cold is a bad idea
Despite the hype, cold therapy isn’t always appropriate. Skip ice baths if you have circulation problems (such as Raynaud’s), nerve damage, open cuts or skin infections on your hands, or if cold exposure has triggered issues in the past. Don’t use ice baths to mask serious pain that affects your grip strength, causes sharp joint pain, or doesn’t improve with rest—those are signs you need medical assessment, not just a bucket of ice. Keep exposures short, stop immediately if you feel numbness, burning, or color changes beyond normal redness, and warm up gradually afterward. Remember that pain relief doesn’t equal healing, and overusing cold to keep training through injury can turn a small problem into a chronic one.
Balancing ice baths with muscle and strength gains
There’s growing evidence that aggressive, frequent post‑workout cooling can blunt some of the muscle‑building and strength‑gaining signals your body sends after training. For home lifters focused on hypertrophy or hitting new PRs, you don’t want to freeze away your progress. That’s why it’s smart to reserve hand and forearm ice baths for phases when pain and inflammation are the priority—like during a flare‑up of elbow tendinopathy or after a competition—rather than after every single session. On normal days, simple active recovery (easy grip drills, light band work, and gentle stretching) may be a better default. Use cold like any accessory in your program: targeted, intentional, and not overdone.
Building a sustainable recovery habit at home
The real power of DIY ice baths is consistency and ease. Set a simple rule, like “ice only on heavy pull days,” and keep your bucket, ice trays, and towels ready to go. Pair the habit with something enjoyable—music, a quick podcast, or breathing drills—so it doesn’t feel like punishment. Track how your forearm soreness, grip fatigue, and performance respond over a few weeks, then adjust: if you feel fresher and pain settles, keep it; if you feel stiff or see no benefit, scale back. Localized cold exposure is just one tool in your home gym recovery toolbox, and the lifters who get the most from it are the ones who apply it thoughtfully instead of chasing every trend.
Used wisely, hand and forearm ice baths can take the edge off post‑workout aches and help you manage flare‑ups from heavy pulling and gripping. They’re cheap, easy to set up in any home gym, and less taxing than full‑body plunges. But they’re not a replacement for smart programming, gradual progressions, and good sleep. Treat localized cooling as a targeted way to calm specific problem areas so you can keep training hard, rather than as a cure‑all, and it can become a valuable part of your long‑term lifting routine.