Building a strong home workout routine is not just about lifting heavier or moving faster. It starts with knowing how well your joints actually move. Simple at-home mobility checks help you spot limitations in your shoulders, hips, ankles and spine before training, so you can adjust your warm-up, choose safer exercises, and reduce the risk of common home-gym injuries.
Why mobility checks matter before every home workout
Mobility is your active range of motion: how far a joint can move under control. When you test it regularly, you quickly see which areas feel tight, unstable or painful. This matters if you love home strength training, kettlebells or bodyweight workouts, because poor mobility in one joint often shows up as pain somewhere else. For example, stiff ankles can stress your knees during squats, and limited shoulder mobility can overload your elbows during push-ups or presses. Quick mobility screens let you modify your session on the spot: maybe you change barbell back squats to goblet squats, or swap overhead presses for landmine presses. Over time, tracking these checks also shows whether your current warm-up and stretching routine is actually working.
Simple shoulder mobility test for safe pressing
Stand tall with your back against a wall, feet about 15 cm away. Keep your lower ribs down and your lower back lightly touching the wall. Raise both arms overhead, trying to touch your thumbs to the wall without your ribs flaring or your lower back arching off the wall. This wall flexion test shows how freely your shoulder joint and upper back move. If your arms cannot reach the wall without compensation, treat overhead work with caution that day. Focus your warm-up on shoulder circles, wall slides and light band pull-aparts. You can still train hard, but keep loads moderate and choose movements that stay in your comfortable range of motion, like incline pressing or floor presses instead of heavy overhead work.
Hip mobility check for better squats and deadlifts
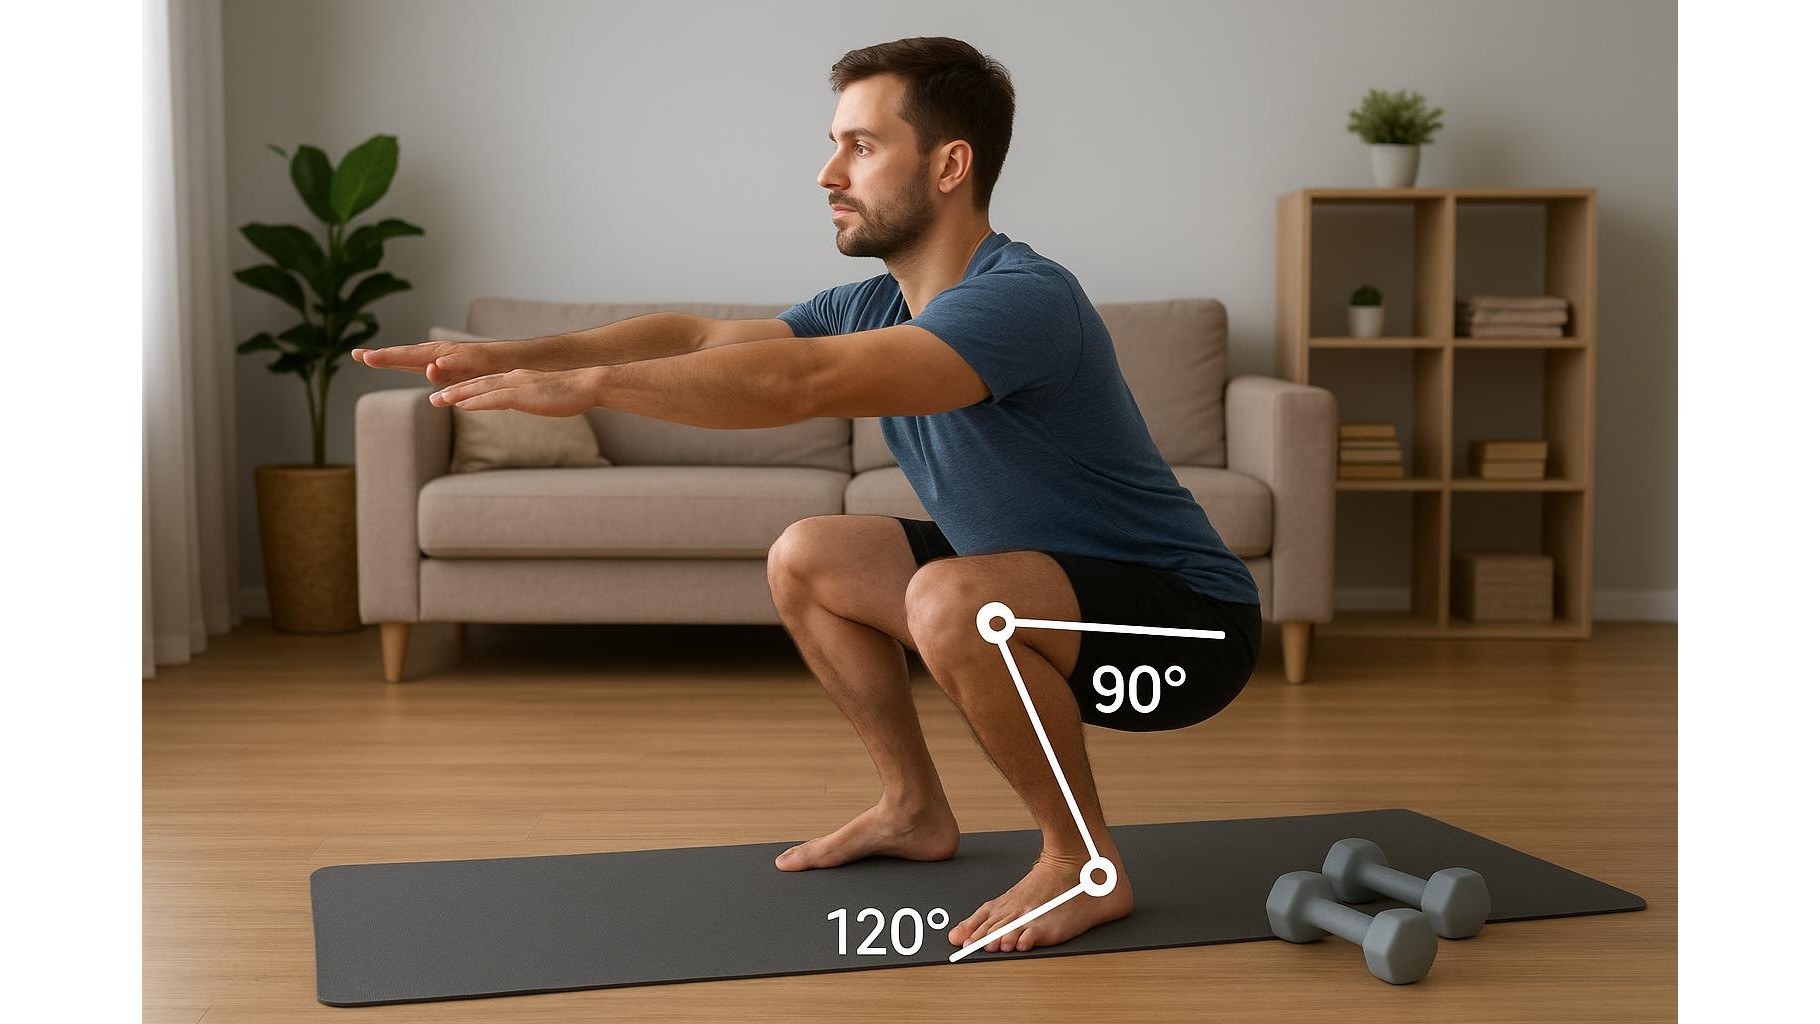
The hips are the engine of most home gym lifts. A quick test is the deep bodyweight squat hold. Stand with feet about shoulder-width apart, toes slightly out. Drop into a squat as low as you can while keeping your heels down, chest up and knees tracking over your toes. Hold for 30 seconds. If you fall backwards, your heels lift, or your lower back tucks hard under (the “butt wink”), your hip and ankle mobility may be limited. On days when this position feels tight, add extra dynamic lunges, 90/90 hip rotations and gentle goblet squat prying in your warm-up. You might also reduce squat depth slightly or elevate your heels on small plates to keep the movement strong but joint-friendly.
Quick ankle mobility test for knees and running comfort
Healthy ankle dorsiflexion is crucial for pain-free squats, lunges and running. Kneel facing a wall with one foot flat on the floor, knee bent. Keeping your heel down, drive your knee slowly toward the wall. Ideally, you can touch the wall with your knee while your toes are about 8–10 cm away. Compare both sides. If one ankle feels stiffer, expect that leg to compensate in squats and step-ups. Before your workout, spend a few minutes on calf raises, ankle rocks over the toes and slow, controlled heel drops off a step. When training, keep an eye on knee tracking and reduce jump volume or deep single-leg work if your ankles feel restricted that day.
Spine mobility test to protect your back
Your spine does not need circus flexibility, but it does need controlled movement. Sit tall at the edge of a chair, cross your arms over your chest, and twist slowly to the right, then left, without letting your hips move. This seated rotation test checks how well your thoracic spine rotates. Next, try a standing cat–camel: round your upper back and then gently extend it, avoiding sharp pain. If rotation and extension feel blocked or uncomfortable, your shoulders and lower back may take extra strain during pressing and rowing. On these days, use more time for thoracic rotations, thread-the-needle drills and light band rows in your warm-up, and keep heavy barbell work conservative while you build better control.
How to turn mobility checks into a sustainable habit
At-home mobility tests only work if you repeat them consistently. Pick one check for shoulders, hips, ankles and spine and run through them in under five minutes before every session. Note what feels restricted and tweak your warm-up accordingly, rather than forcing your body into positions it is not ready for. Over weeks, you should notice smoother squats, easier overhead reach and more stable single-leg work. If a joint feels painful or dramatically worse over time, consult a professional. Mobility screening is not about chasing perfect form on day one, but about listening to your body so you can keep training hard, safely, for the long term.
By adding these simple joint checks to your routine, you move from guessing to informed decision-making each time you train. You will warm up smarter, choose exercises that respect your current limits, and gradually expand your range of motion instead of fighting against it. That is the foundation of sustainable home fitness: knowing your body, not just your numbers.